
How to Plant a Small-Space Garden
By Emily Hamel, Lower Fort Garry National Historic Site, MB
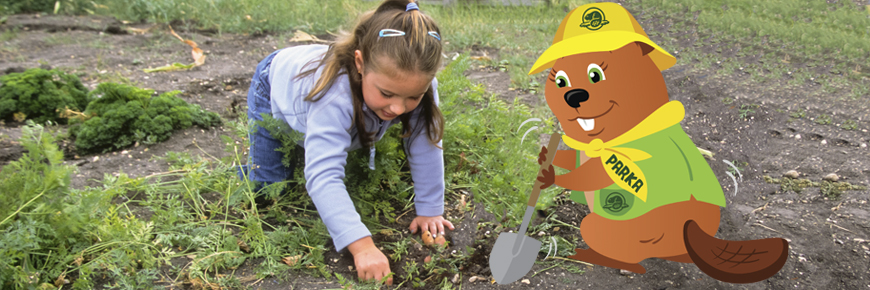
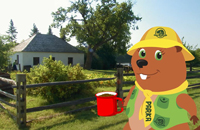
With the arrival of spring, it is time for us here at Lower Fort Garry National Historic Site to prepare our garden! Lower Fort Garry has Canada’s oldest collection of stone fur trade buildings. In keeping with the spirit and tradition of the site, our farm manager helps grow food that would have been fed to men who worked in the fur trade.
Every year, we plant heirloom vegetables at the Farm House such as potatoes, beans, corn, lettuce, beets, squash, pumpkins, peas, carrots, cucumbers, herbs and much more! Once the vegetables are ready for harvest in July and August, every Wednesday we invite kids to head out to the garden with interpretive staff dressed in authentic bonnets and britches to pick the vegetables for supper!
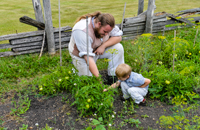
Since not all families can visit during the summer months to help with the harvest, I invite you to try and make your own garden at home. In the video Parka and the Gardens, Parka visited Lower Fort Garry and shared that you can grow big or little gardens! No need for a big backyard! With a little bit of space and the right vegetables, you can grow your very own garden in small pots or containers on your windowsill, balcony or porch!
Container-Friendly Vegetables
Historically, not all of these were found at Lower Fort Garry – but they are easily accessible today:
- Lettuce
- Spinach (grow in cooler weather, like early spring or late summer, to prevent the plant going to seed)
- Cherry tomatoes (choose a variety that is compact and bushy or miniature)
- Radishes
- Peppers
- Peas (will need a support system to climb and grow)
- Beans (will need a support system to climb and grow)
- Several types of herbs (thyme, rosemary, basil, mint, parsley, oregano, etc.)
Once you have chosen your vegetables, you can sprout seeds in clear plastic cups or put the seeds in soil in small containers.
Method 1: Sprout seeds in clear plastic cups
This method is great for younger children – they’ll love watching the seeds sprout. It is ideal for easy-to-manipulate seeds like peas and beans.
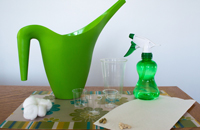
You will need:
- Small or medium clear plastic cups
- Paper towels or cotton balls
- A lid, plastic cling wrap or a small clear plastic container with holes at the top (like a salad or spinach clam shell container)
- Seeds of your choice
- Water
- Optional: spray bottles
Instructions:
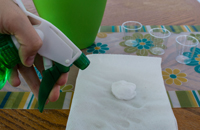
- Spray paper towels or the cotton balls with water until damp. Do not soak.
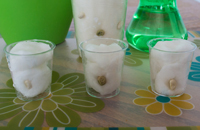
- Roll up the paper towels and place in a medium cup, or fill a small cup with cotton balls.
- Insert seeds between the paper towels or cotton balls and along the sides of the cup. You can put 2 seeds in a small cup or 5 in a larger one.
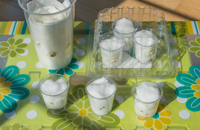
- Cover with a clear lid or plastic cling wrap and make a few holes at the top. You could also place the smaller cups in a clear plastic container. The idea is to create a mini greenhouse.
- Place in a bright area.
- Ensure the paper towel or cotton balls do not dry out. Add a bit of water if needed.
- Watch the seeds sprout!
Method 2: Sprout directly in soil in small containers
If you choose this method, kids won’t be able to see the seeds sprouting, but it is less stressful on the seeds. It is ideal for smaller seeds.
You will need:
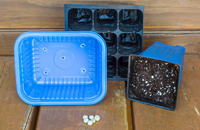
- Containers: fiber pots, plastic cell trays, greenhouse kits or recycled plastic containers (just make sure to clean all pots before planting and punch small holes at the bottom)
- Potting soil/seed starter mix (choose a subsoil that is light, porous and will retain moisture well)
- Seeds of your choice
- Optional: clear plastic containers, like salad or spinach clam shell containers
Instructions:
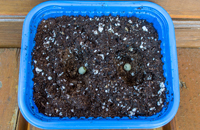
- Fill your containers with moistened soil/seed starter mix.
- Make a little hole for the seed. The smaller the seeds, the shallower you should make the holes. You can also read the seed package direction to determine how deep each seed should be planted.
- Drop a seed into the hole. Cover the seed with soil. If you are planting herbs, you can place a couple of seeds in each container.
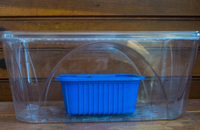
- Optional: Put the containers into a clear plastic container to act as a greenhouse. As soon as the seeds sprout, remove the clear plastic container.
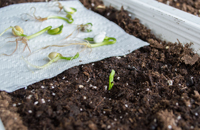
- Put in a warm bright place and water if needed, to keep the soil moist (be careful not to soak the soil).
- Wait for the seeds to sprout!
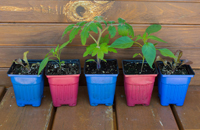
Transplanting and the final steps!
After a few days, the seeds will have sprouted. Once they’ve grown about an inch (sprouted in cups) or are about 3-4 new leaves high (sprouted in soil), you can transplant them into bigger pots so they will have enough space to grow.
You will need:
- Different size pots or containers, preferably with drainage holes or a tray system
- Deck planters or flower boxes for your spinach and lettuce (approximately 2 plants per container)
- Rectangle boxes or bigger deck planters with supports (bamboo, wires, netting or trellis) for plants like peas and beans to grow and hang (approximately 3 plants per box)
- 1 gallon pot (6 x 6-7 inch deep) for herbs
- 2 gallon pot (8 x 8 inches deep) for radish (6-7 radishes per container)
- 5 gallon pot (10 x 10 inches deep) for tomatoes (1 plant per pot) and peppers (1 to 2 plants per pot)
- Potting soil (choose a subsoil with plenty of nutrients)
- Optional: compost
Instructions:
- Put moistened soil in a pot. If you want, add a little bit of compost.
- Dig a hole in the soil.
- If you sprouted the seeds in a clear cup, gently place the sprouted seed into the hole, roots towards the bottom. If you sprouted seeds in soil, gently slide the container off the moist soil and plant, and place the seedling into the hole.
- Cover the roots and bottom part of the plant with soil and add a little water.
- Let nature take over and watch your plants grow! Don’t forget to water your plants every couple days!
Growing your vegetables
You can keep your garden inside if you live in a colder climate, but you will need to put the pots as close as possible to a window with a lot of sun exposure. When the weather is warmer, you can move your pots outside.
Your plants will need to “harden up”: for a few hours each day, you can put the plants outside to expose them to outdoor conditions, then bring them back in. This can be repeated for a longer period of time each day, for at least a week, before leaving the plants outside for good. You may need to bring your pots in on cool nights (below 10ºC).If your balcony is in direct sun all day, it will get very hot (especially in cities during hot summer days). You might want to move your pots in the shade or water them more often during hot periods.
Gardening is a process. You and your kids can experiment to determine what grows best in your area. The main thing to keep in mind is simply to have fun while learning all about how nature works!
Enjoy growing and eating your own vegetables!
Download this activity (PDF, 977 Kb)
- Date modified :